American Independence Day Recipes
Perfect Homemade Beef Burgers

| Passive Time | 20 minutes |
| Servings |
MetricUS Imperial
|
Ingredients
- Beef silverside rump, chuck steak or skirt (allow at least 200g untrimmed meat per burger/person)
- The best baps or burger buns you can lay your hands on - or use sections of thick baguette least artificial
- Salt and freshly ground black pepper
- Choice of toppings
- Sliced ripe tomatoes (lightly dressed with olive oil if you like)
- Finely sliced raw onions
- Good butterhead or Cos lettuce roughly torn if you like, but not shredded, not iceberg
- Tomato ketchup
- mayonnaise
- Dill pickled cucumbers sliced
- Thinly sliced mild cheese I think Gruyère or Edam is better than Cheddar
Ingredients
|
|
Instructions
- If using meat from the freezer, bear in mind that chilled or even partially frozen meat minces better than warm, so don't over-thaw it. Wipe the meat as dry as possible with a cloth and trim it carefully, scrupulously removing all sinew and gristle but leaving a few odd pieces of good clean fat. Mince the meat on a coarse setting, or chop it by hand with a large heavy knife until you have a coarse mince that binds together well.
- Burgers should be made up as close to barbecuing time as possible. Take a generous handful of meat, about 150g, and pack it into a tight ball between your hands. Flatten gently between your palms, pressing the edges in with your fingers to make a well-bound patty.
- The final shape and thickness of each patty are a matter of personal choice but there are various factors to consider – most notably, how pink do you want it in the middle and how burnt do you want it on the outside? A thick, rounded burger can give you the best of both worlds: a fairly charred exterior, rich in caramelised meat and charcoal-smoky flavours, and a centre that is still pink, or even almost raw.
- Another option is to have a discus-shaped burger. with a fat middle but thinner, tapered edges. The thinking behind this is that you will get a nicely charred, "well-done" outer edge on your burger while the middle remains pink and juicy. It seems to work. Even a well-done burger should be juicy and, with that in mind, I wouldn't make a burger less than an inch thick.
- Lightly brush each patty with oil, then place on the barbecue over a high heat. Burgers have a tendency to stick on the barbecue grill bars, even when oiled. so a sharp spatula that can be run under them is a must (as is a rich vocabulary of child-friendly expletives, "Burger!" being a useful example). The longer you leave the burger, the less likely it is to stick, as the charring of the meat slowly releases it from the bars of the grill. Pressing the burger down on the grill with the spatula may help to accelerate this process (and will also speed up the cooking).
- Given the inevitable variation in burger thickness and barbecue temperature, not to mention personal taste, it's hard to give precise guidelines for cooking times and turning points. But I can say that, stuck or not, I like to flip my burger after just 3-4 minutes, as I want it fairly rare. And a couple of minutes on the other side usually finish it off. My wife, who likes her burger literally raw (and I mean fridge cold) in the middle, gives it scarcely a minute on each side, but the barbecue has to be very hot, Don't forget to season lightly with salt and pepper just before you turn the burger.
- What's important is to know your own kit, and your own taste, and to concentrate on the job in hand. Burgers require greater precision than other barbecue foods, because an overcooked burger is spoiled (whereas chicken, pork or sausages may be more forgiving). But once you've tamed the burger and the barbie, you'll find you are able to turn out anything from a well-done to a bloody-as-hell with instinctive ease.
When you think your burger is done as you like it, set it to rest off the heat for a minute or two while you prepare your bun and appropriate garnishes. I can't possibly tell you what you like on your burger but I can suggest some choices and I can tell you what I like. My own customised burger comprises the following stack, from the ground up, as it were
- Bun base, mayonnaise 1, lettuce, ketchup, salt and pepper 1, burger, sliced tomatoes, salt and pepper 2, mayonnaise 2, bun top.
- I might occasionally go for a cheeseburger, in which case the cheese goes directly on top of the burger to encourage melting, and a few sliced onions might get a look in on top of the cheese. I never butter the bun, nor do I toast it, and the bun I prefer is a soft, flour-dusted bap made by a local baker.
- Incidentally, my favourite indoor way to cook a burger is on a lightly oiled, heavy-based frying pan. They tend to stick on a ridged grill pan, as they do on the barbecue, so if you are not reaping the benefit of the charcoal flavour, you may as well spare yourself the grief.

Press Release2 weeks ago
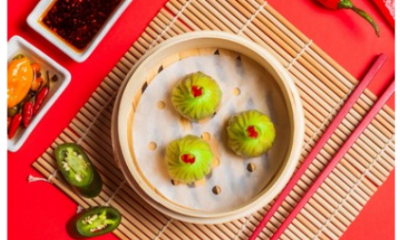
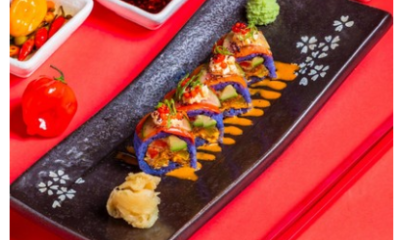
Tuk Tuk – The Night Noodle Market at The Fatty Bao
Tuk Tuk The Night Noodle Market at The Fatty Bao Bengaluru, Karnataka – 2nd April, 2024 – Mark your...
Press Release2 weeks ago
Which mangoes are coming in this season? Attributed to – Team Madras Mandi
Which mangoes are coming in this season? Attributed to – Team Madras Mandi India accounts for a staggering 50% of...

Press Release1 month ago
Spicing it up! : Foo’s Fiery Edit Menu Is Back
Spicing it up! : Foo’s Fiery Edit Menu Is Back Get ready to turn up the heat with Foo’s much-awaited...

Press Release1 month ago
Experience the Fiery Edit Special Extravaganza at Foo
Experience the Fiery Edit Special Extravaganza at Foo Get ready for a Spicy feast like no other! Commence on a...


Press Release2 months ago
From Field to Feast: Maverick & Farmer Celebrates the Harvest Festival with an Immersive Weekend
From Field to Feast: Maverick & Farmer Celebrates the Harvest Festival with an Immersive Weekend A curated experience, workshops, exciting...